


Master Range Hood Installation: Simple Steps for a Polished Kitchen Look
A range hood, also called a vent hood or kitchen hood, is an essential appliance that keeps your kitchen cleaner, safer, and more comfortable by removing smoke, odors, grease, and steam produced during cooking. Installed above your stove or cooktop, it uses a fan and filtration system to maintain air quality and prevent surface buildup.
Range hoods come in various types and configurations to suit different kitchen layouts and styles. Ducted hoods vent air outside through a duct system, while ductless hoods filter and recirculate air back into the kitchen. You can also choose from wall-mounted, under-cabinet, or island hoods, depending on your space and design preferences.
However, even the best range hood can’t perform optimally without proper installation. Correct placement, secure mounting, and careful attention to ventilation and electrical connections ensure your hood operates efficiently, quietly, and blends seamlessly with your kitchen design. This post covers everything you need to know for a professional-looking installation, ensuring optimal performance and a sleek, finished appearance.
What to Consider Before Installing a Range Hood
Before beginning your range hood installation, a few factors must be evaluated to ensure safety, efficiency, and proper performance. Taking time to plan will save effort and avoid potential issues later.
Key considerations include:
- Ventilation Type: Decide whether your hood will vent air outside (ducted) or use recirculation (ductless). Venting outdoors is generally more effective for heavy cooking.
- Hood Size: The hood should be at least as wide as your cooktop, ideally extending an inch or two beyond on each side.
- Mounting Height: The standard installation height is 24 and 30 inches above the cooking surface for most models.
- Power Supply: Confirm that you have an appropriate electrical connection and circuit available for the vent hood installation.
- Duct Path: If venting outdoors, plan the shortest, straightest path possible to improve airflow and reduce noise.
Also Read: How to Choose A Range Hood?
Tools and Materials Required to Install Your Range Hood
A smooth kitchen hood installation requires having the right tools ready before you start. Gathering these in advance will help you complete the job efficiently and safely.
Common tools and supplies include:
- Measuring tape and level
- Power drill and screwdriver
- Stud finder
- Wire connectors and electrical tape
- Ducting materials (if venting outside)
- Wall or ceiling caps for exterior venting
- Screws, mounting brackets, and hardware supplied with the hood
- Protective gloves and safety glasses
Double-check the manufacturer’s manual for specific tools required for your model before starting your vent hood installation.
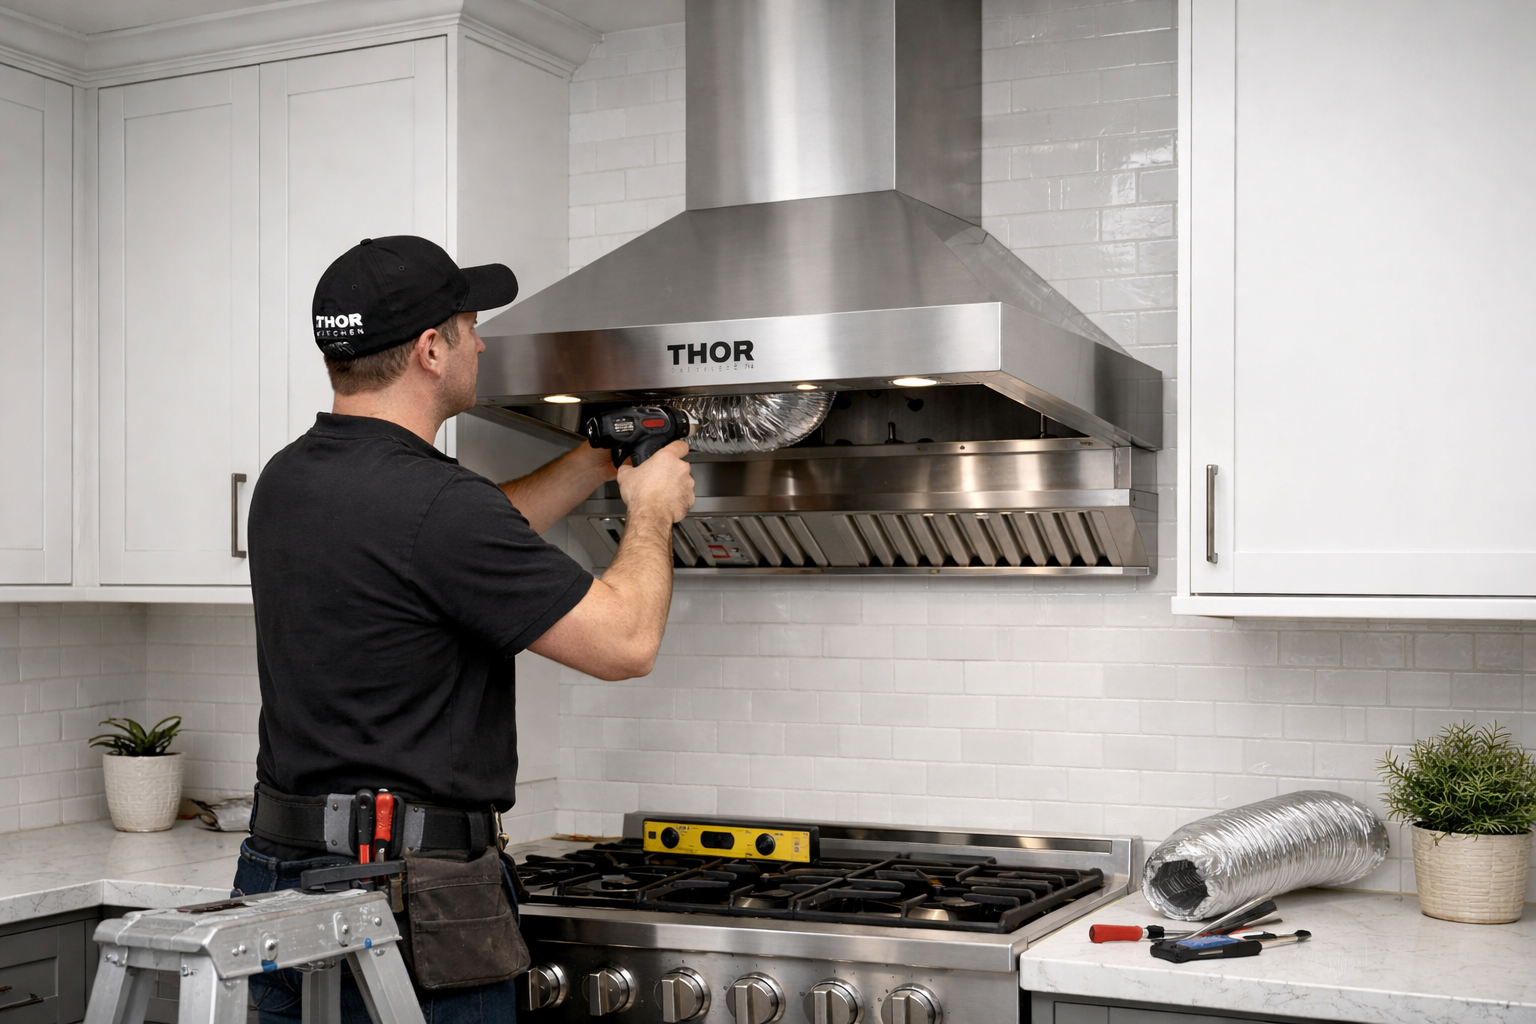
How to Install a Range Hood: Step-by-Step Instructions
A properly completed vent hood installation ensures quiet operation, strong suction, and a clean finish that complements your kitchen design. Whether you’re replacing an old unit or installing a new one, following an organized process, as mentioned below, ensures a professional-looking result.
Note: The below installation steps are provided for general guidance only. Electrical work, ducting, and structural modifications should be performed by a licensed professional in accordance with local building codes and safety regulations. Improper installation may result in injury, fire hazards, or property damage.
- Measure and Mark: Use a measuring tape to mark the location of the hood’s mounting points and duct opening (if applicable). Confirm that it aligns with your cooktop and cabinetry.
- Locate Studs: Use a stud finder to locate and mark the wall studs where the hood will be secured. Mounting into studs provides stronger support.
- Prepare Electrical Connection: Turn off power at the circuit breaker, then route the electrical wiring to the designated spot for the hood.
- Install the Duct (for vented models): Cut an opening for the ductwork, then attach it, and seal the joints with aluminum tape to prevent air leaks.
- Mount the Hood: Align the hood with the markings, then secure it with screws or mounting brackets.
- Connect Wiring: Join the hood’s electrical wires to the household wiring, then secure with wire connectors.
- Attach Filters and Covers: Install grease filters, lights, and decorative covers as instructed in the manufacturer’s guide.
- Test the Hood: Restore power and test all fan speeds and lights to confirm proper operation and airflow direction.
Read More: 10 Helpful Kitchen Hood Cleaning Tips
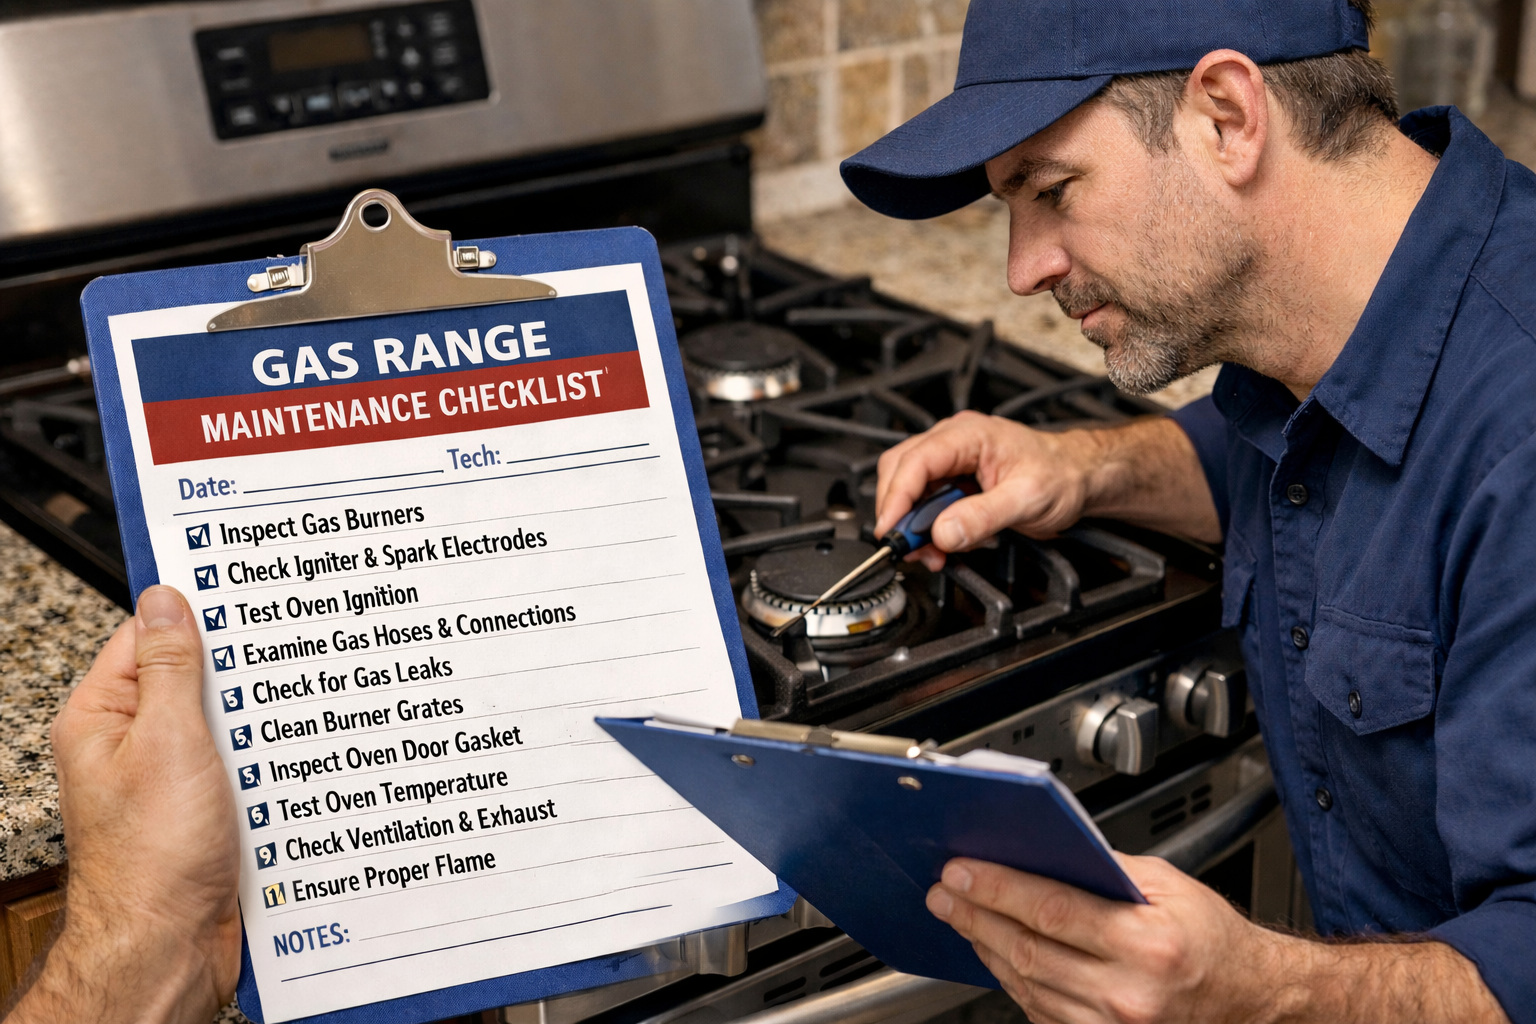
Common Installation Mistakes to Avoid
Even a simple range hood installation can go wrong if key details are overlooked. Avoiding some common mistakes will help you achieve long-term efficiency and safety. Working with a licensed professional is strongly recommended to reduce safety risks and protect your appliance investment.
Watch out for these errors:
- Incorrect Mounting Height: Installing the hood too low may create safety hazards; while placing it too high reduces suction efficiency.
- Improper Duct Size: Undersized ducts can cause noise, vibration, and poor ventilation. Always follow the manufacturer's duct diameter guidelines.
- Too Many Duct Bends: Every bend restricts airflow, limiting elbows and turns to maintain proper suction.
- Skipping Sealant: Failing to seal duct joints can lead to air leaks, odors, and energy loss.
- Ignoring Electrical Codes: Always follow local building and electrical safety codes or consult an electrician if unsure.
Seamless Range Hood Installation: Get Tips and Guidance from THOR Kitchen
A well-planned range hood installation not only improves air quality but also adds polish and value to your kitchen. Whether you’re managing a new build or updating an existing space, paying attention to proper kitchen hood installation techniques ensures both style and performance.
With careful preparation, the right tools, and attention to detail, your vent hood installation can look as professional as a contractor’s work; leaving your kitchen cleaner, fresher, and more enjoyable for every meal. For added confidence, THOR Kitchen offers a range of high-performance range hoods along with expert installation guidance and resources. Explore models from THOR Kitchen that combine professional-grade airflow, sleek designs, and support for a seamless installation experience.
FAQs About Range Hood Installation
-
Can I install a range hood myself?
Yes, if you have basic DIY and home electrical experience. That said, tasks involving wiring, duct alterations, or load-bearing mounting are best handled by a licensed installer to help ensure safe operation and code compliance. -
Do range hoods have to be vented outside?
No. Ductless models use charcoal filters to clean air before recirculating it indoors. Still, venting outdoors is preferred for heavy cooking or high heat. -
Do you need a vent hood for an electric stove?
Yes. Even without gas combustion, an electric stove produces steam, grease, and odors that a vent hood installation effectively removes. -
Are range hoods plugged in or hard-wired?
Some plug into a standard outlet, while others are hard-wired directly. Since this requires working with household wiring, having a qualified electrician perform or review the installation can help prevent safety hazards and installation errors. -
Can range hoods be vented through the wall?
Yes. Many models allow venting through walls, ceilings, or roofs; choose the shortest and most direct route to improve airflow. An experienced installer can evaluate your kitchen layout and recommend the most efficient and safest venting route. -
How high should your range hood be?
It should be typically between 24 and 30 inches above the cooktop surface. Following manufacturer guidelines is critical, and an installer can confirm proper clearance to support both performance and fire safety. -
How do I determine the right size of range hood for my kitchen?
Measure the width of your cooktop; your hood should match or slightly exceed that measurement. For gas stoves, consider higher CFM (cubic feet per minute) ratings for stronger airflow. A kitchen ventilation specialist can also assess your space and cooking habits to recommend the most suitable model. -
How much does it cost to install a range hood?
The cost to install a range hood in the U.S. typically ranges from $300 to $3,000+, -depending on the hood type and installation complexity.
- Under-cabinet or wall-mounted hoods: $700–$1,000+
- Island range hoods: $500–$1,400+ (ceiling mounting required)
- Downdraft hoods: $1,500–$3,000+ (complex installation)
- Ductless (recirculating) hoods: $300–$1,200 total for convertible units